


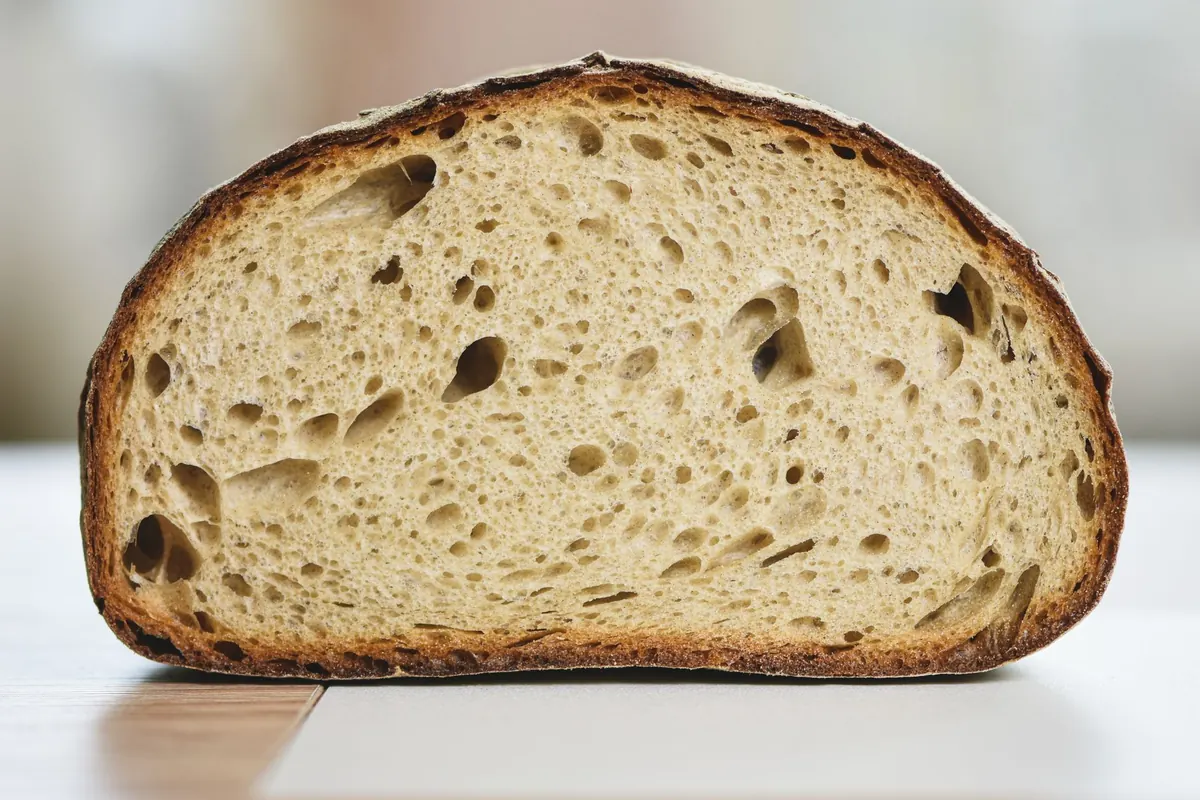
You cut into a loaf you have waited eighteen hours for, and the knife meets resistance. The crumb is tight and damp, closer to a heavy cake than bread. It is a deflating moment, and it is rarely bad luck. Dense sourdough almost always traces back to one of a few fixable problems: a starter that is not ready, dough that has not finished fermenting, too little water, or handling that knocked the structure out of the dough.
The encouraging part is that each of these leaves evidence. Learn to read the crumb, the crust and the way the dough felt under your hands, and you can usually diagnose a dense loaf in a minute and change one thing on the next bake instead of guessing at five.
Start with the starter, because everything else follows
If your starter is sluggish, no amount of careful folding will save the loaf. A culture that bubbles but never really lifts is not strong enough to raise a kilo of dough. Neither is one that peaked six hours ago and has already collapsed back into a thin, sour slurry.
What you want is a starter that rises predictably. Feed it, keep it somewhere warm — roughly 24 to 26°C is a comfortable range — and watch the timing. Most healthy white starters double within four to eight hours at that temperature. If yours takes twelve hours and barely crests the band on the jar, it is not ready for bread.
Signs your starter is ready to mix
- The top is domed, not sunken, and the sides of a glass jar show a web of bubbles.
- It smells like yoghurt or mild vinegar, not acetone or nail polish remover. A sharp solvent smell usually means it has been hungry for a while.
- A spoonful floats in a glass of water. This is a rough check rather than a rule — rye and wholemeal starters often sink even when they are perfectly active.
- It has risen to its peak within the last hour or two. Slightly past peak is fine; hours past peak is not.
If the starter is failing all of these, spend a week on it before baking again. Discard and feed twice a day, keep it warm, and swap in a little wholemeal or rye flour for a few feeds — the extra minerals and enzymes tend to wake a tired culture up.
Underproofing: the most common reason a loaf bakes up tight
Dough that has not fermented long enough goes into the oven with very little gas and very little of the softening that fermentation brings to the gluten. The result is a crumb that is dense and even, sometimes with a few large tunnels surrounded by tight, packed crumb, and a crust that stays pale even after a long bake.
The unreliable part is that underproofing gets judged by the clock. Bulk fermentation at 21°C and at 27°C are entirely different experiences, and a recipe written in someone else's kitchen rarely matches the temperature in yours. Watch the dough instead: it should look puffy and slightly domed at the edges, show small bubbles on the surface and the sides of the bowl, and feel like a soft cushion when you press it. Volume-wise, most doughs want to grow by roughly half to three quarters before shaping.
The poke test, done properly
Dust a finger with flour and press about a centimetre into the dough. If it springs back immediately and firmly, the dough needs more time. If the dent fills in slowly and only partway, it is ready. If the dent stays put, you have gone past the sweet spot and the loaf will spread rather than rise. During the final proof, the same test on a shaped loaf tells you when to load it into the oven.
An aliquot jar takes the guesswork further. Tuck a small piece of dough into a narrow jar right after mixing, mark the level, and let it sit beside the bowl. You can see exactly how much it has grown without opening the lid of the main container.
Hydration: more water is not automatically better, but too little is a problem
Stiff dough makes a tight crumb. That is not a flaw — it is exactly what you want in bagels or a firm sandwich loaf. But if you are after an open, custardy crumb and you are working at 62% hydration with a strong white flour, no folding technique will get you there. Around 70 to 75% is a sensible baseline for a plain white sourdough; wholemeal and rye flours drink considerably more.
The fix is not to jump straight to 85%. Raise hydration by two or three percent at a time, bake, and see how the dough handles. A wet dough you cannot shape confidently will end up flatter and denser than a moderate one you can handle well. One practical habit: hold back 5 to 10% of the water, mix the rest, and add it after the flour has absorbed the first batch. You will feel the dough's limits rather than following a number blindly.
Shaping errors that squash the structure you built
All that fermentation builds a network of gas bubbles. Shaping is where you either organise that network into tension or press it flat. Heavy degassing is the usual culprit — punching, kneading or rolling the dough after bulk fermentation knocks out the gas you spent hours making. Deliberate deflation is fine for a sandwich loaf; for an open crumb, use a light hand.
The second problem is a shape with no tension. A loosely gathered ball spreads sideways in the banneton, and a loaf that spreads cannot rise upward. Work through it in steps:
- Preshape gently. Gather the dough into a rough round with a bench knife, just enough to bring it together.
- Rest it. Twenty to thirty minutes uncovered lets the gluten relax so the final shape does not tear.
- Build tension. Shape with the dough on a lightly floured bench, dragging it toward you to tighten the surface. It should fight back slightly.
- Seal the seam. Pinch it closed, then place the loaf seam-side up in the basket so the seam stays shut as it proves.
Go easy on the bench flour, too. A heavily floured surface stops the dough from gripping, so you cannot build tension, and thick patches of raw flour create dense, gummy bands in the finished crumb.
Overproofing looks different but ends in the same place
Past the point of readiness, the gluten starts to break down and the structure weakens. The dough feels slack, sticky and fragile, spreads rather than holds a shape, and may show large surface bubbles. Baked, it gives a pale, thin crust and a crumb that is gummy and compressed near the base. The remedy is to shorten the bulk or the final proof, or move the shaped loaf to the fridge for a slow, controlled retard — cold dough is far more forgiving of a busy afternoon.
Baking: your last chance to correct a dense crumb
A perfectly fermented loaf can still come out heavy if it is underbaked or baked without steam. Steam keeps the crust soft long enough for the loaf to expand fully in the first ten minutes; without it, the surface sets early and the rise stops. A covered Dutch oven handles both problems at once: preheat it thoroughly, bake covered at around 250°C for twenty minutes, then uncovered at 220 to 230°C for another twenty to twenty-five minutes, until the crust is properly dark and the loaf sounds hollow.
Then wait. Slicing warm bread crushes the crumb under the knife and releases steam that turns the interior gummy — two hours on a rack is not excessive for a large loaf.
A practical order for your next bake
When a loaf disappoints, resist changing everything at once. Work through the list in order and change one variable per bake, keeping brief notes on room temperature, fermentation time and how the dough felt.
- Confirm the starter doubles within six to eight hours of feeding.
- Measure your room and dough temperature, then set fermentation time from that.
- Let bulk fermentation run until the dough is puffy, jiggly and up by half to three quarters.
- Shape with real tension and seal the seam.
- Bake hot with steam and cool the loaf completely before cutting.
Do that for three or four bakes and the pattern behind your dense loaves will usually become obvious. Most bakers find it was the starter or the proof all along — and both are simply a matter of paying attention to the dough rather than the clock.
Photo: Alexas Fotos / Pexels
Related posts
More stories you’ll love reading